Setting up WordPress on AWS is a breeze if you follow these three steps. But before you dive in, make sure you've signed up for AWS. During the sign-up, you'll need to verify your account using a credit card – they'll hit you with a $1 charge and send a verification code via SMS.
Once you're all set, opt for the Free support plan and find yourself in the console, where the real action begins.
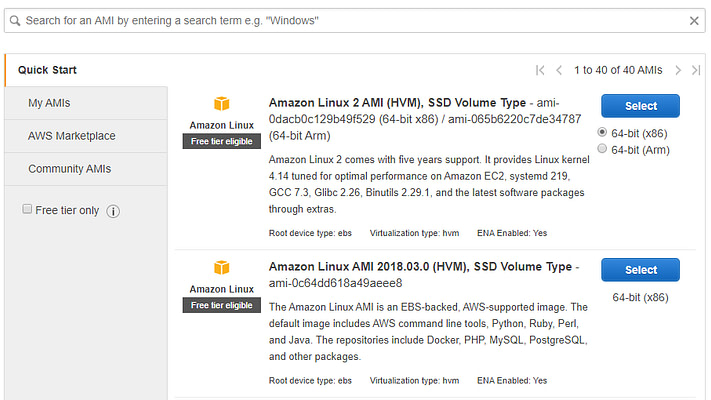
 Now, pick what type of instance to launch. Keep it simple by going for the AWS Marketplace option on the left-hand menu. There, you'll find a smorgasbord of pre-built machine setups ready for your use.
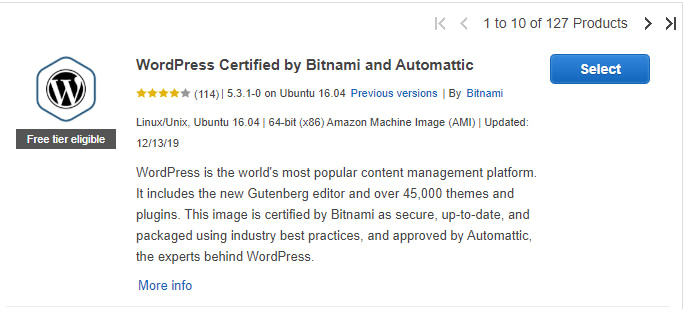
 If you're lazy, use the search feature for "WordPress" setups. You'll be bombarded with over 100 configurations. Look for the WordPress Certified by Bitnami and Automattic option – it's the golden ticket.
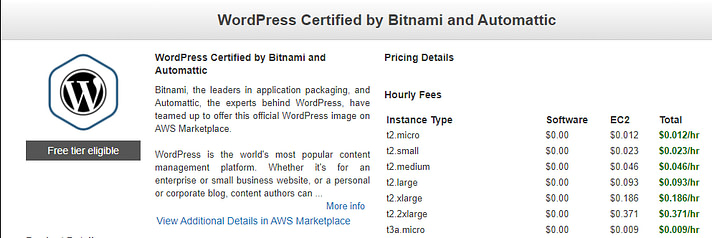
 Clicking "Select" reveals the juicy details and hourly fees for different instance levels. Don't fret; we're not breaking the bank.
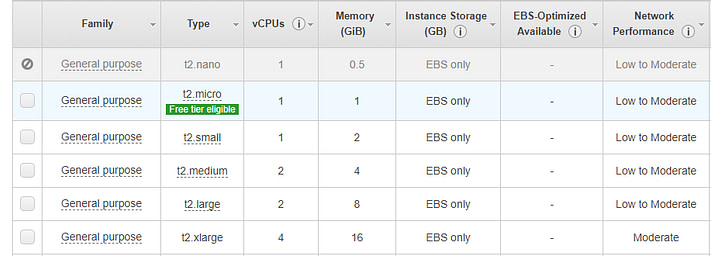
 Moving on, you get to decide the kind of instance you want. For the tight-budget folks, the t2.small setup with 2 GB of RAM is your buddy. If you're feeling generous, go with t2.medium for 2 vCPUs and 4 GB of RAM.
For the tech-savvy folks, pick whatever suits your needs. It's like choosing your weapon – the decision is yours.
Moving on, you get to decide the kind of instance you want. For the tight-budget folks, the t2.small setup with 2 GB of RAM is your buddy. If you're feeling generous, go with t2.medium for 2 vCPUs and 4 GB of RAM.
For the tech-savvy folks, pick whatever suits your needs. It's like choosing your weapon – the decision is yours.
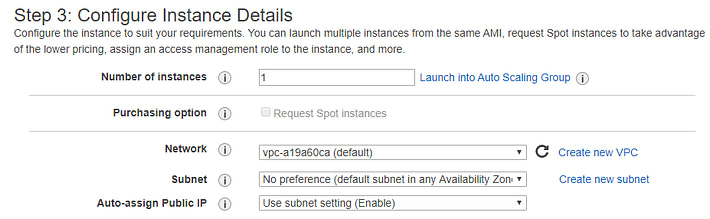
 After the instance selection, review the configuration. If you're a VPS rookie, stick with the default settings. WordPress will run smoothly without any hiccups.
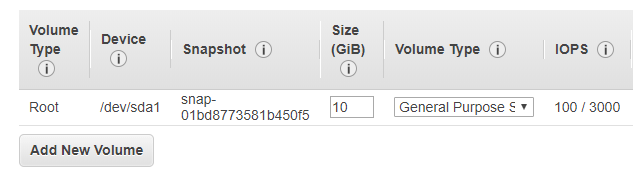
Feeling adventurous? Check the AWS documentation before tweaking anything. Click "Next" to decide on storage. Remember, AWS charges you for extra storage, so be mindful. By default, you get 10 GB – not too shabby.
After the instance selection, review the configuration. If you're a VPS rookie, stick with the default settings. WordPress will run smoothly without any hiccups.
Feeling adventurous? Check the AWS documentation before tweaking anything. Click "Next" to decide on storage. Remember, AWS charges you for extra storage, so be mindful. By default, you get 10 GB – not too shabby.
 Lastly, review your configuration and hit "Launch." AWS will pop the question about creating a 'key pair' for SSH access to your server. Create a new pair because you never know when it might come in handy.
Now, let the launch commence. AWS needs a few minutes to get everything ready. Sit back and relax – you're on your way to WordPress glory on AWS!
Lastly, review your configuration and hit "Launch." AWS will pop the question about creating a 'key pair' for SSH access to your server. Create a new pair because you never know when it might come in handy.
Now, let the launch commence. AWS needs a few minutes to get everything ready. Sit back and relax – you're on your way to WordPress glory on AWS!
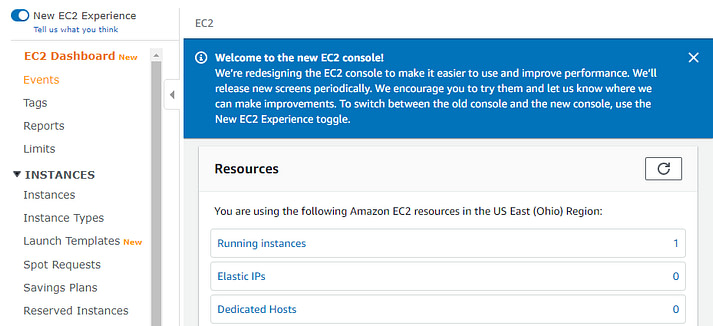
 Now, on the next page, find the Running Instances thing under the main menu.
 There should be this one lonely instance there. Click on it, and you'll see its public IP chilling in the details. It's like the home address of your new WordPress buddy.
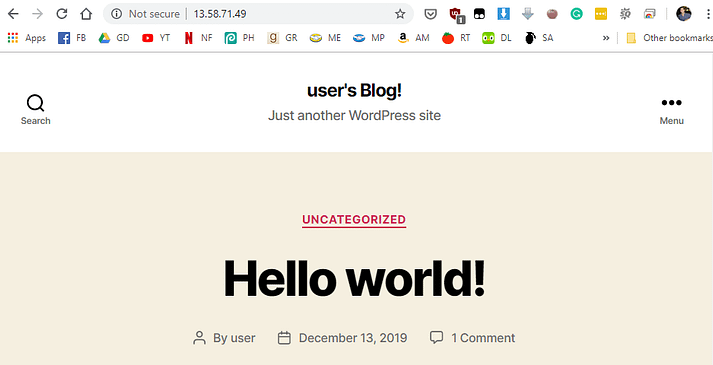
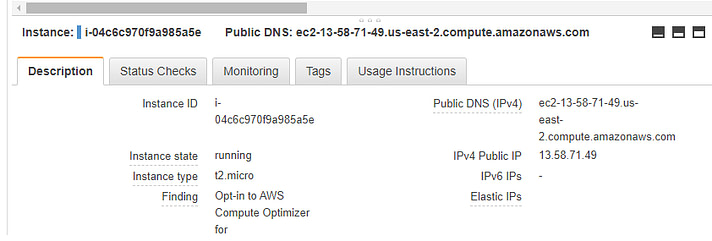 Type that IP into your browser, and voila! You got yourself a fancy new WordPress website, all hosted on AWS. Ain't that cool?
 But wait, don't go celebrating just yet. Before you do anything wild, you gotta hook up a domain to your IP so the whole world can join the party.
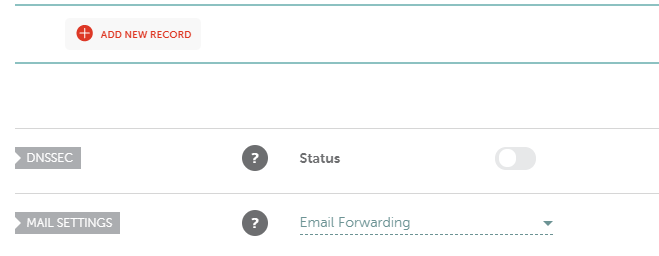
 Once you're in, hit that ADD NEW RECORD button. Choose A Record, set the Host thingy to www. Stick your instance's IP in the field, and be lazy with the TTL – set it to Automatic.
 Save the changes, then play the waiting game. Give it a few hours, and let the changes spread like gossip. After that, boom! Your WordPress thing will have a fancy domain name.
 While you wait, start doing the real work – mess with the settings, pick a cool theme, and all that jazz!
Step 1: Launch and configure a WordPress instance
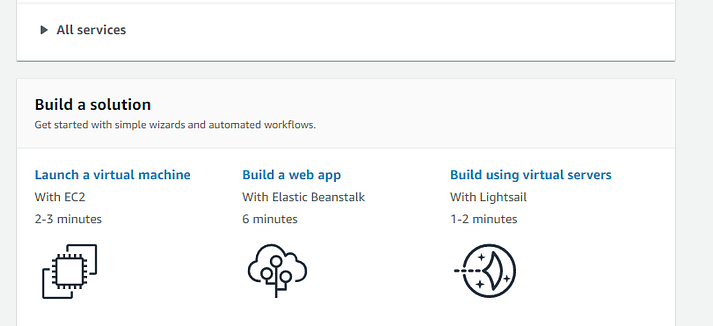
Your first task is to kick off an AWS EC2 instance. These are like virtual servers but simpler, ideal for your AWS debut. To get an instance going, scout for the "Launch a virtual machine" option on your console's main screen. It's like giving birth to a new virtual machine.
Now, pick what type of instance to launch. Keep it simple by going for the AWS Marketplace option on the left-hand menu. There, you'll find a smorgasbord of pre-built machine setups ready for your use.
If you're lazy, use the search feature for "WordPress" setups. You'll be bombarded with over 100 configurations. Look for the WordPress Certified by Bitnami and Automattic option – it's the golden ticket.
Clicking "Select" reveals the juicy details and hourly fees for different instance levels. Don't fret; we're not breaking the bank.
Moving on, you get to decide the kind of instance you want. For the tight-budget folks, the t2.small setup with 2 GB of RAM is your buddy. If you're feeling generous, go with t2.medium for 2 vCPUs and 4 GB of RAM.
For the tech-savvy folks, pick whatever suits your needs. It's like choosing your weapon – the decision is yours.
After the instance selection, review the configuration. If you're a VPS rookie, stick with the default settings. WordPress will run smoothly without any hiccups.
Feeling adventurous? Check the AWS documentation before tweaking anything. Click "Next" to decide on storage. Remember, AWS charges you for extra storage, so be mindful. By default, you get 10 GB – not too shabby.
Lastly, review your configuration and hit "Launch." AWS will pop the question about creating a 'key pair' for SSH access to your server. Create a new pair because you never know when it might come in handy.
Now, let the launch commence. AWS needs a few minutes to get everything ready. Sit back and relax – you're on your way to WordPress glory on AWS!
Step 2: Find your WordPress thingy on AWS and grab its public IP
So, go back to the AWS thing, you know, the place where all the magic happens. Look up there in the Services tab, find the EC2 thing, and click on it.
Now, on the next page, find the Running Instances thing under the main menu.
There should be this one lonely instance there. Click on it, and you'll see its public IP chilling in the details. It's like the home address of your new WordPress buddy.
Type that IP into your browser, and voila! You got yourself a fancy new WordPress website, all hosted on AWS. Ain't that cool?
But wait, don't go celebrating just yet. Before you do anything wild, you gotta hook up a domain to your IP so the whole world can join the party.
Step 3: Make your domain point to your AWS thing
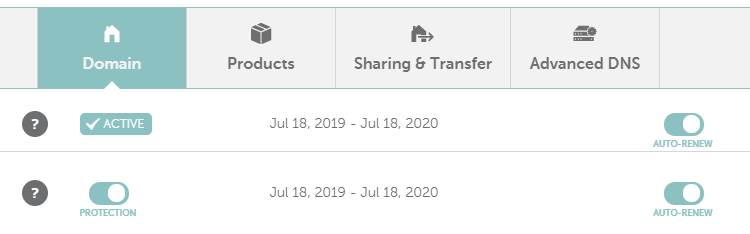
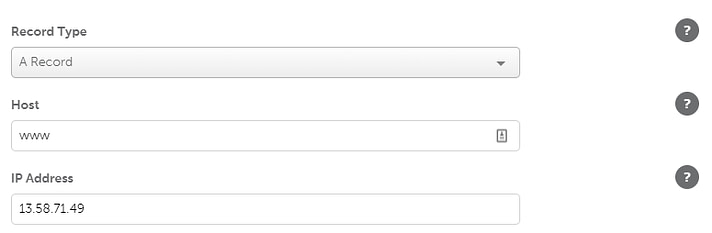
Now, how you do this depends on where you bought your domain. Let's take Namecheap as our guinea pig. Go to your domain settings, look for the Advanced DNS tab – it's where the real action is.
Once you're in, hit that ADD NEW RECORD button. Choose A Record, set the Host thingy to www. Stick your instance's IP in the field, and be lazy with the TTL – set it to Automatic.
Save the changes, then play the waiting game. Give it a few hours, and let the changes spread like gossip. After that, boom! Your WordPress thing will have a fancy domain name.
While you wait, start doing the real work – mess with the settings, pick a cool theme, and all that jazz!